Security, MFA, and sessions
Use Authentication > Security to control the risk level of account access. This page covers MFA, session duration, bot prevention, step-up authentication, and privileged sessions.
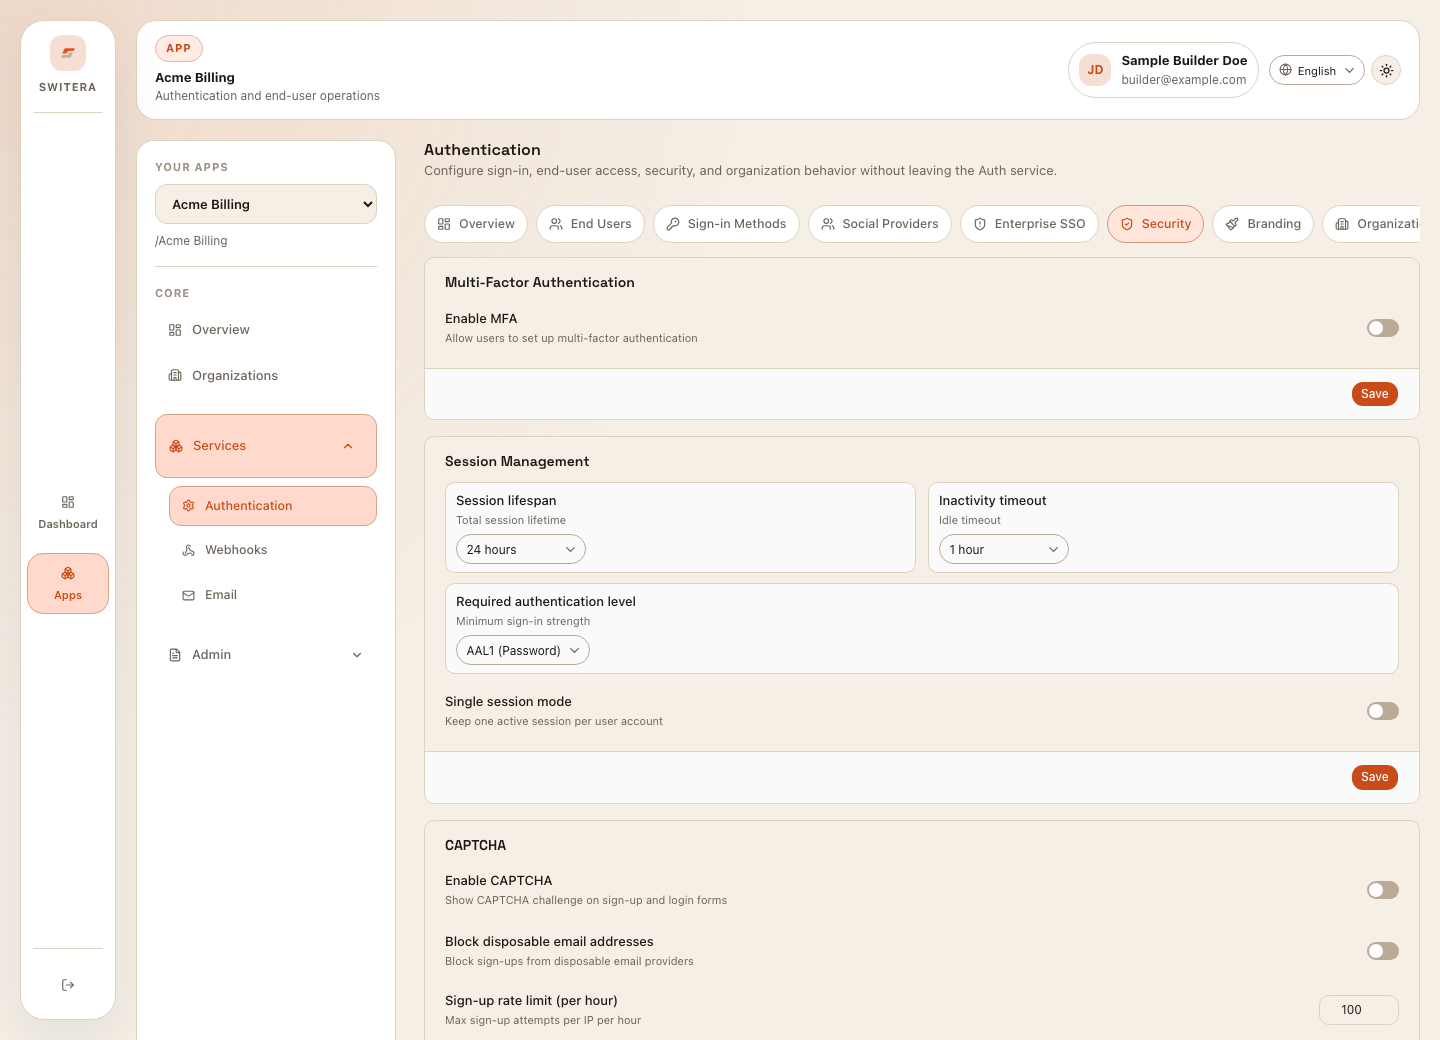
Start with session policy
Review:
- how long a normal session lasts
- when idle sessions expire
- whether remember-me behavior is allowed
- whether admins need shorter session duration
- whether session changes should force reauthentication
Shorter sessions reduce risk but can frustrate users. Longer sessions improve convenience but require stronger safeguards.
Enable MFA intentionally
MFA is useful when:
- users have access to sensitive data
- admins can change billing, security, or identity settings
- enterprise customers require stronger assurance
- account takeover risk is high
Before enforcing MFA:
- Confirm the recovery path works.
- Test enrollment with a small group.
- Communicate the change before enforcement.
- Keep a support process for lost factors.
Test authenticator enrollment
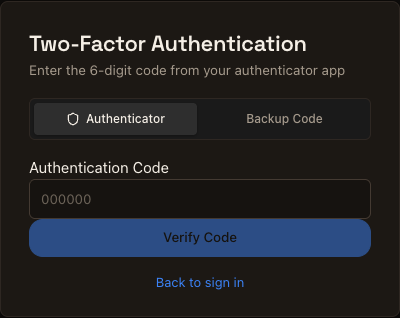
Use a dedicated app and end user before enabling a policy for customers. Enable optional authenticator MFA and backup codes in Authentication > Security, and register your application's OAuth callback URL. The end user must already be allowed to sign in under your app's email-verification policy.
With an authenticated @switera/auth client in your application:
const enrollment = await auth.setupTOTP();
// Display enrollment.qr_code_data_url in the user's private security page.
// The user scans it with their authenticator and enters its current code.
await auth.verifyTOTP(codeFromAuthenticator);

const { codes } = await auth.generateBackupCodes();
const status = await auth.getMFAStatus();
// status.totp_enabled is true; status.backup_codes_remaining is 10.
Do not log the enrollment secret, QR contents, authenticator codes or backup codes. Let the end user save their backup codes securely. Generating a new set invalidates the previous set.
- Open a fresh browser session and sign in to your app.
- Confirm that hosted login asks for an authenticator code before returning to your callback.
- Enter a current six-digit code and confirm that your application's SDK finishes the callback.
- In another fresh session, choose Backup Code and paste one of the
SDK-generated codes. Both
xxxx-xxxxand the compact eight-character form are accepted. - Confirm that reusing the same backup code is rejected.
These are managed app end-user flows, not Switera builder-account MFA. The live test covers optional authenticator MFA and backup-code recovery; required enrollment, SMS and security-key flows are not covered by that result. See SDK validation limits.
If login cannot verify your app's sign-in requirements, retry or contact support. Do not disable MFA as a workaround for an unavailable security check.
Disable or recover MFA
An authenticated end user can call auth.disableTOTP(). Check
auth.getMFAStatus() afterward. TOTP disable currently removes the
authenticator enrollment but does not remove backup-code records.
A builder with user-management permission can reset an end user's TOTP and
backup codes through the end-user security controls or the trusted-backend
endpoint DELETE /api/v1/apps/{appId}/users/{userId}/mfa. Verify the resulting
state using GET on that endpoint: totp_enabled must be false and
backup_codes_remaining must be zero. This reset does not remove security-key
credentials. Never expose a builder or app secret in the end user's browser.
Read an end user's passkeys
After the end user signs in to your app, use its authenticated Auth SDK client:
const passkeys = await auth.listPasskeys();
// Each item has id, display_name, created_at and optional last_used_at.
This calls GET /api/v1/connect/me/passkeys using the end user's access token.
The app and identity come from that token, not an app ID supplied by the browser.
A valid empty inventory returns []. Authentication failures, inactive app
membership, and temporary service errors must not be displayed as "no passkeys".
Do not send a builder session or secret app key from this security page.
This is an inventory read, not passkey enrollment. Second-factor security keys
are separate. Registration, passkey login and deletePasskey(id) are not yet
accepted customer journeys; keep those controls unavailable until their
browser and policy checks pass. See SDK validation limits.
Bot prevention
Bot prevention can include CAPTCHA, disposable email blocking, and sign-up or login rate limits.
Use it when:
- public sign-up is enabled
- trial abuse is likely
- password guessing attempts appear in logs
- provider login is exposed to a broad audience
Do not enable controls that block legitimate users without a recovery plan.
Step-up authentication
Step-up asks a user to re-authenticate before sensitive operations. Use it for actions such as:
- changing password or email
- adding MFA
- viewing or rotating keys
- changing organization owner roles
- changing SSO settings
Privileged sessions
Privileged sessions are useful when admins perform high-risk actions. Keep the window short and require fresh authentication.
Launch checklist
- baseline sign-in method works
- email verification and recovery work
- MFA policy is clear
- session duration matches risk level
- bot prevention has been tested
- step-up protects sensitive operations
- support knows how to handle locked-out users
Related pages: